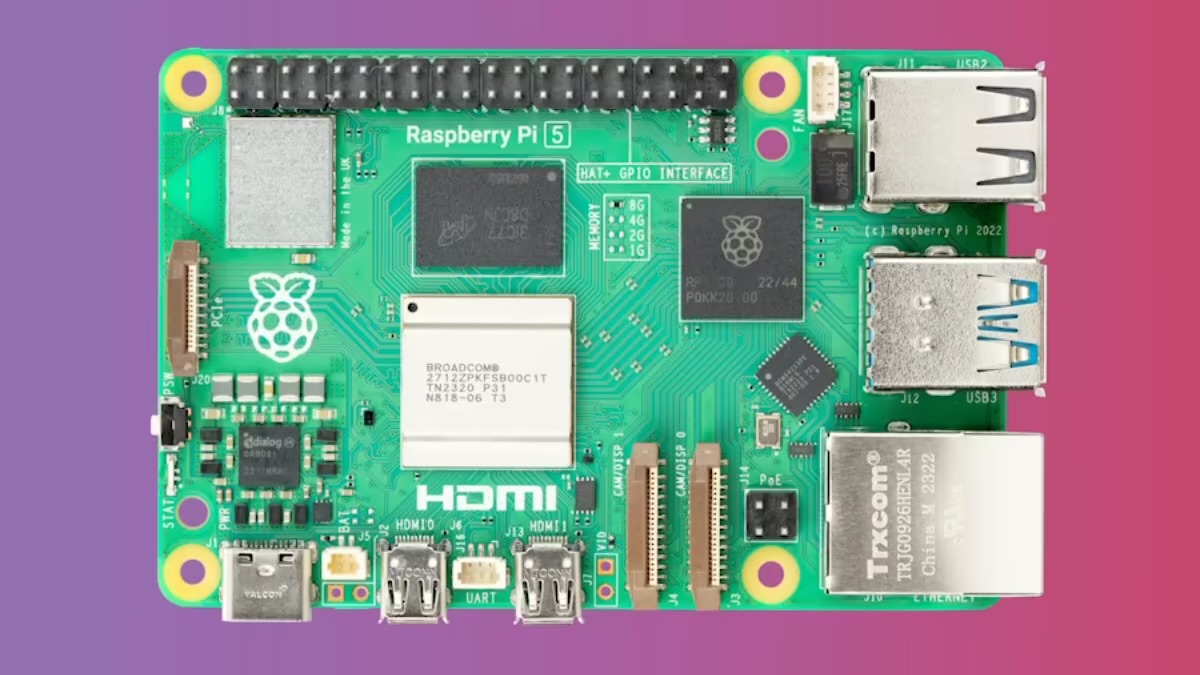
Mastering The Management Of Raspberry Pi Remotely: A Complete Guide For Enthusiasts
Listen up, tech-savvy folks! If you’ve ever found yourself wondering how to manage your Raspberry Pi remotely, you’re not alone. The world of Raspberry Pi has exploded in popularity, and for good reason. It’s a tiny powerhouse that can do everything from running home automation systems to hosting your own private server. But here’s the deal—what happens when you need to tweak settings or troubleshoot issues while you’re miles away from your setup? That’s where the management of Raspberry Pi remotely comes into play. In this guide, we’ll break down everything you need to know to take full control of your Pi, no matter where you are.
Managing Raspberry Pi remotely isn’t just a cool trick—it’s a necessity for anyone serious about maximizing the potential of their device. Whether you’re a hobbyist tinkering with IoT projects or a professional managing a fleet of Pis, remote management saves time, boosts efficiency, and keeps your projects running smoothly. So, buckle up because we’re about to dive deep into the nitty-gritty details of how you can make this happen.
Before we get started, let me set the stage. This guide is designed to be your go-to resource for all things related to remote Raspberry Pi management. We’ll cover everything from setting up SSH connections to using advanced tools like VNC and web-based interfaces. By the end of this, you’ll have the skills to manage your Pi like a pro, even if you’re sipping coffee on the other side of the globe. Now, let’s get to it!
- Tamilbastersws Your Ultimate Destination For Tamil Entertainment
- Filmy Fly 2025 The Ultimate Journey Into The Future Of Entertainment
Understanding the Basics of Raspberry Pi Remote Management
Alright, let’s start with the basics. The management of Raspberry Pi remotely revolves around a few core technologies and protocols. The most common method is using SSH (Secure Shell), which allows you to access your Pi’s terminal from another computer. Think of SSH as a secure tunnel that lets you send commands and interact with your Pi as if you were sitting right in front of it.
But wait, there’s more! Remote management isn’t limited to just SSH. Tools like VNC (Virtual Network Computing) let you access the graphical desktop interface of your Pi, while web-based interfaces offer a browser-friendly way to control your device. The key is finding the right combination of tools that fit your specific needs and skill level.
Why Managing Raspberry Pi Remotely Matters
Here’s the thing—Raspberry Pi projects often involve devices that are physically located in hard-to-reach places. Maybe you’ve set up a weather station on your roof or a security camera in your backyard. In situations like these, remote management becomes a game-changer. Instead of climbing ladders or braving the elements, you can make adjustments and check statuses from the comfort of your living room.
- Exploring The Legacy Of Ditka A Football Icon Like No Other
- Unveiling The Truth About Mms Sex Videos What You Need To Know
Plus, remote management opens up a world of possibilities for collaboration. Imagine working on a project with a team spread across different locations. With the right setup, everyone can access the Pi and contribute to the project without needing to be in the same room. It’s like magic, but with code.
Setting Up SSH for Remote Access
Let’s talk about SSH, the bread and butter of Raspberry Pi remote management. SSH is a protocol that provides secure communication between devices over an unsecured network. Setting it up is surprisingly simple, and I’ll walk you through the process step by step.
Enabling SSH on Your Raspberry Pi
To enable SSH on your Raspberry Pi, you’ll need to do one of two things. If you’re using the graphical interface, head over to the Raspberry Pi Configuration tool, navigate to the Interfaces tab, and toggle SSH to enabled. Easy peasy. Alternatively, if you’re working with the command line, you can enable SSH by running the following command:
sudo raspi-config
From there, select the option to enable SSH and confirm your choice. Once it’s enabled, your Pi will be ready to accept SSH connections from other devices on your network.
Connecting to Your Pi via SSH
Now that SSH is enabled, it’s time to connect. You’ll need the IP address of your Raspberry Pi, which you can find by running the command:
hostname -I
With the IP address in hand, fire up your favorite SSH client. On Windows, PuTTY is a popular choice, while macOS and Linux users can simply use the terminal. Type in the following command, replacing the IP address with your Pi’s actual address:
ssh pi@192.168.1.100
Enter your Pi’s password when prompted, and voilà—you’re connected! From here, you can run commands, transfer files, and manage your Pi as if you were sitting right in front of it.
Exploring VNC for Graphical Remote Access
While SSH is great for command-line tasks, sometimes you need a graphical interface to get things done. That’s where VNC comes in. VNC allows you to remotely access the desktop environment of your Raspberry Pi, giving you full control over its graphical interface.
Installing and Configuring VNC
To set up VNC, you’ll first need to install the VNC Server on your Raspberry Pi. Run the following command to install it:
sudo apt install realvnc-vnc-server realvnc-vnc-viewer
Once installed, enable VNC by heading to the Raspberry Pi Configuration tool and toggling it on under the Interfaces tab. With VNC enabled, you can now connect to your Pi using a VNC client on your computer or mobile device.
Connecting to Your Pi with VNC
Download the VNC Viewer app on your device and enter your Pi’s IP address to establish a connection. You’ll be prompted to log in with your Pi’s credentials, and once you’re in, you’ll have full access to the desktop environment. It’s like sitting at your Pi’s keyboard and monitor, but from anywhere in the world.
Using Web-Based Interfaces for Raspberry Pi Management
For those who prefer a browser-friendly approach, web-based interfaces offer a convenient way to manage your Raspberry Pi remotely. Tools like Pi-hole’s web interface and the Raspberry Pi’s built-in web server make it easy to monitor and control your device without needing to install additional software.
Setting Up a Web Server on Your Raspberry Pi
One of the simplest ways to manage your Pi remotely is by setting up a web server. Apache and Nginx are popular choices, but for lightweight projects, Python’s built-in HTTP server might be all you need. To set it up, navigate to the directory you want to serve and run:
python3 -m http.server 8000
Now, you can access your Pi’s files and services by entering its IP address followed by the port number in your browser. For example:
http://192.168.1.100:8000
Monitoring and Managing with Pi-hole
Pi-hole is a popular ad-blocking solution that runs on Raspberry Pi, but it also offers a powerful web interface for managing your network. Install Pi-hole by running the following command:
curl -sSL https://install.pi-hole.net | bash
Once installed, access the Pi-hole dashboard by entering your Pi’s IP address in your browser. From here, you can monitor network activity, block unwanted ads, and configure DNS settings—all from a sleek web-based interface.
Securing Your Remote Raspberry Pi Connections
Security is a top priority when managing Raspberry Pi remotely. Leaving your device exposed to the internet without proper safeguards is like leaving your front door unlocked. Let’s talk about how to secure your remote connections and protect your Pi from potential threats.
Using Strong Passwords and Key-Based Authentication
The first line of defense is using strong passwords. Avoid using common passwords or ones that are easy to guess. For added security, consider switching to key-based authentication. Generate an SSH key pair on your local machine and copy the public key to your Pi using the following command:
ssh-copy-id pi@192.168.1.100
Once the key is copied, disable password authentication by editing the SSH configuration file:
sudo nano /etc/ssh/sshd_config
Set PasswordAuthentication to no and restart the SSH service:
sudo service ssh restart
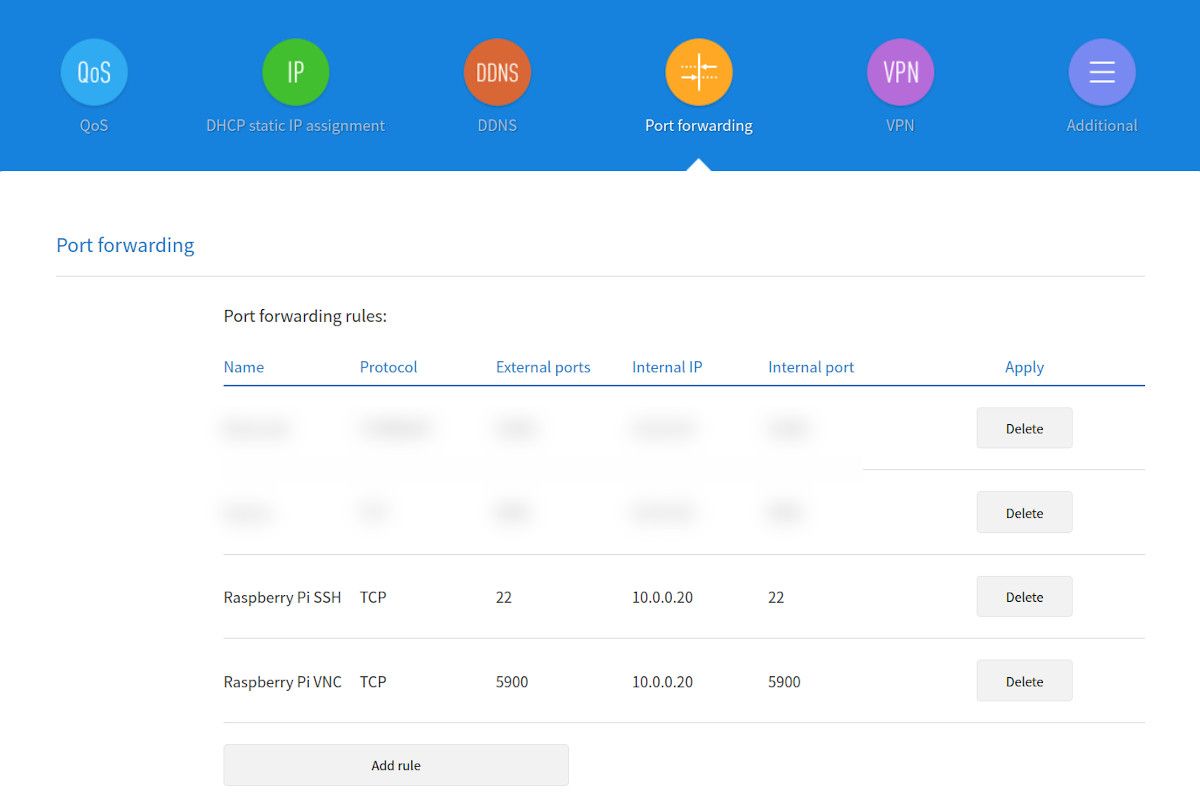
Firewall and Port Forwarding
Firewalls are another essential security measure. Use a tool like UFW (Uncomplicated Firewall) to restrict access to your Pi. For example, allow only SSH traffic by running:
sudo ufw allow 22
If you need to access your Pi from outside your local network, set up port forwarding on your router. Forward the necessary ports (e.g., 22 for SSH) to your Pi’s IP address, but be cautious—exposing your Pi to the internet comes with risks.
Troubleshooting Common Issues in Remote Management
Even with the best setup, things can go wrong. Let’s tackle some common issues you might encounter while managing your Raspberry Pi remotely and how to fix them.
Connection Refused or Timeout Errors
If you’re getting connection refused or timeout errors, double-check your Pi’s IP address and ensure SSH or VNC is enabled. Verify that your firewall rules allow the necessary traffic and that port forwarding is correctly configured on your router.
Slow or Unresponsive Connections
Slow connections can be frustrating, but they’re often caused by network congestion or high CPU usage on your Pi. Monitor your Pi’s resources using tools like htop or top and consider upgrading your hardware if needed. Additionally, ensure your network connection is stable and optimized for remote access.
Advanced Techniques for Raspberry Pi Remote Management
Ready to take your remote management skills to the next level? Let’s explore some advanced techniques that can enhance your Raspberry Pi experience.
Automating Tasks with Cron Jobs
Cron jobs allow you to schedule tasks to run automatically at specified intervals. Whether it’s backing up files, updating software, or running scripts, cron jobs can save you time and effort. To create a cron job, edit the crontab file:
crontab -e
Add your desired task in the format:
* * * * * command_to_execute
Replace the asterisks with the desired schedule and specify the command you want to run.
Monitoring System Health with Remote Tools
Keeping an eye on your Pi’s health is crucial for long-term reliability. Tools like watch, htop, and syslog provide valuable insights into your Pi’s performance and system logs. Combine these tools with remote access to stay informed about your Pi’s status from anywhere.
Conclusion: Take Control of Your Raspberry Pi Today!
And there you have it—a comprehensive guide to mastering the management of Raspberry Pi remotely. From setting up SSH and VNC to securing your connections and automating tasks, you now have the tools and knowledge to take full control of your Pi, no matter where you are.
So, what are you waiting for? Dive in, experiment, and make the most of your Raspberry Pi’s potential. And don’t forget to share your experiences and tips in the comments below. Who knows—you might inspire someone else on their Raspberry Pi journey!
Until next time, keep coding, keep creating, and keep pushing the boundaries of what’s possible with technology.
Table of Contents
- Understanding the Basics of Raspberry Pi Remote Management
- Setting Up SSH for Remote Access
- Exploring VNC for Graphical Remote Access
- Using Web-Based Interfaces for Raspberry Pi Management
- Securing Your Remote Raspberry Pi Connections
- Troubleshooting Common Issues in Remote Management
- Advanced Techniques for Raspberry Pi Remote Management
- Conclusion: Take Control of Your Raspberry Pi Today!
Detail Author:
- Name : Constance Satterfield
- Username : helga89
- Email : amparo.wisoky@gerlach.org
- Birthdate : 1989-08-31
- Address : 969 Hyatt View Thereseside, DC 03595
- Phone : 775-650-0962
- Company : Bergnaum Ltd
- Job : Nuclear Power Reactor Operator
- Bio : At laborum amet id corrupti. Atque ut perferendis ab. Qui aut sit perferendis officiis est veritatis qui ut.
Socials
tiktok:
- url : https://tiktok.com/@hmcdermott
- username : hmcdermott
- bio : Tempore accusantium aut nam. Cumque quia voluptatem excepturi sed.
- followers : 1541
- following : 438
twitter:
- url : https://twitter.com/hester_real
- username : hester_real
- bio : Aut porro expedita sit. Veritatis nulla hic sit qui et nobis nulla. Tempora dolorum aut modi. Sunt possimus porro quia porro sed.
- followers : 4971
- following : 2886
facebook:
- url : https://facebook.com/hester.mcdermott
- username : hester.mcdermott
- bio : Illum vitae autem omnis sit culpa.
- followers : 1742
- following : 1503
